Tuesday, February 4, 2025

DIY Wall Mounted Table

 My laundry situation is a pile... of MESS.

Truly evaluating why, I realize that it's because I bring the clean laundry out of the laundry room and into the living area of our house to fold... yet, I don't really have an assigned location to do so. 

Skipping excuses - I have just decided that when I'm in "laundry mode," I need to do laundry (get this) In. The. Laundry. Room!

This past weekend I did something that I haven't done in - well, let's count the years. I promised Dave that I wouldn't touch a saw while pregnant. Our son is seven years old, and after making that promise while pregnant with him, I just... was busy.

Back to this weekend. I used a table saw, hand saw, screwdriver, drill, and elbow grease to make myself a wall-mounted (correction: door-mounted) folding table. And DIYing felt sooooo good!

I remembered my grandma having had a wall-mounted table in her kitchen, and when seeking solutions to my laundry-pile-mess I thought back to that table. Hers was a lift-up wall-mounted table. I needed a pull-down due to the door handle. Surprisingly, there weren't too many options online. (There are individual sellers on sites like Etsy. No shade to them! I just wanted this table now. No waiting. No shipping.)

I'm journaling the project for future reference.

This is truly my first DIY project since living in this house. Our house. And there will be more!


MATERIALS:

47.75" x 23.75" x .65" white MDF shelf board (in actuality, it's 5/8 thick) - $20
1" x 4" PVC trim board (in actuality, it's 3/4" thick and 3 1/2" wide) - $20
1" x 2" PVC trim board (in actuality, it's 1 1/2" x 5/8" thick) - $6
Edgemate white iron-on edge tape - $9
1 1/2" x 30" piano hinge - $14
2 1/2" hinge - $5
Everbilt white steel window sash lock - $3
Clear Gloss Enamel spray paint - $6
2 1/4" PVC trim screw white

PROCESS:

Measure. Measure. Measure.

this table needed a brace on the bottom. A frame on the top to house the lock. I also needed to consider the length of the table, how much room I would have behind me while folding, how long the legs would be, and what would be a comfortable height for me to fold. All while working around the door's handle.

Fully completed, it measures 36" long and 36" tall. (Correction - from the door's wall, it comes out into the room 36 7/8".)

My awesome neighbor, Larry, helped me run the shelving board through my table saw and the tabletop is exactly 36". 


The true bummer about wanting MDF shelving this large, is that the sides were not finished like smaller shelving boards can be. So, the next step was ironing on the edge tape and trimming the excess.


Cut the 1x4 trim board to two lengths of 31 3/4" and one length 23 3/4" wide.

Take the three cuts of the larger trim board and screw them together in an upside down "u." I did so with wood glue, and utilizing my Kreg Pocket Hole Jig 720.  This creates the table legs.
Cut the 1x2 trim board to two lengths of 23 3/4" wide. These two strips are to frame the table on the top and the bottom. 

Cut the piano hinge to 23 3/4" wide. (I added sanding and spray painting the hinge white.) Then screw the hinge into the tabletop and one of the small trim board lengths. This creates the bottom frame that will be screwed into the door, allowing for the tabletop to hinge/pull down.
I made a doozie of a mistake on my next step. But, it ended up becoming one of my favorite features to this table.

My fave guys at Caughlin Ranch Ace Hardware initially suggested that I use brass folding support mounts, but I really didn't want to see them when the table was folded up. I decided to pivot, and instead I went with the 2 1/2 inch utility hinges. When I screwed one fold onto the underside of my tabletop, the screws were ever-so-slightly too long, and poked holes into the top of my table.
GAAAAAHHHHHH! I was so super bummed. 

Then I remembered a book that I read to my kids often, Beautiful Oops! by Barney Saltzberg. The message being, "When you think you've made a mistake, think of it as an opportunity to make something beautiful."


So. Since my kiddos are the reason for 95% of my laundry, I wanted them to be a part of this table as well.


I sanded the MDF melamine with 60 grit sandpaper. Then, my kiddos painted the tabletop. Zac, ever the engineering mind, used a ruler to draw out shapes and painted a beautiful geometric abstraction. Stella, our free spirit, painted a beautiful whimsical abstract.


They used their (washable) paints. A couple hours later I sprayed their masterpiece with two layers of Gloss Enamel just to seal their art, prevent stickiness, and hopefully prevent chipping. (We shall see.)


After an overnight dry time, and another trip to Ace Hardware to get some shorter screws, I screwed the hinges into the top of the table legs + bottom of the tabletop. Great news - the tabletop remained undisturbed.

(Hint: the legs needed to be connected to the underside of the tabletop so that the feet are level with the bottom of the base frame. This leaves 2 1/4" at the top of the underside of the tabletop which is needed for the legs to rest and for the sash lock.)


Screw the sash lock onto the top frame, as well as the underside of the tabletop.


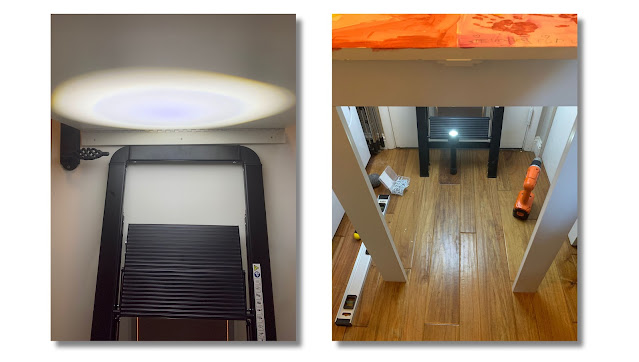
Mounting: Mounting this baby solo was "fun." I had to find a way to keep the table level, hold it, and screw the 1 1/2" base frame into the door. My trusty stepstool really helped.


With the base frame attached to the appropriate location of my door, I pulled the table down to see whether it was sturdy enough. Relief! The table works great. The legs don't want to slide out towards me. But, just in case, I attached clear rubber bumpers to the bottom of the table legs.


I held the table up against my door and propped the top frame on top of the table in order to screw it to the door. The sash lock works great at holding the tabletop in place.

Voilá!


No comments:

Post a Comment